
Great photos make a great listing

Better Photos for Better Sales with Brian Chong
Any experienced seller on eBay knows this one simple truth: The better your images are, the more likely you are to make a sale.
The quality of your image gallery has a direct impact on the success of your eBay listing. Your photos are the first thing that buyers see, showing them everything they need to know to make a purchase decision. Today, we have invited Brian Chong, a professional photographer, to show you how to take better photos for your listings. Let’s get started!
Hello, I’m Brian Chong!
I’ve been a commercial photographer for more than 10 years, specializing in food, product and interior photography. I cannot stress enough how much good photos matter when it comes to selling a product.
So today, I’m going to share with you my professional secrets when it comes to taking great photos for your products.
Before we begin the tutorial, you will need a:
-
White table
-
Lamp
-
Light bulb
-
White Manila Card (matte)

Lesson 1: Setting Up
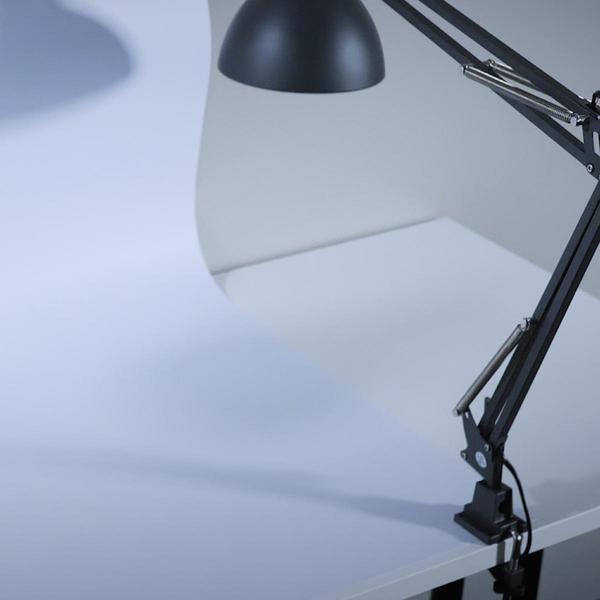
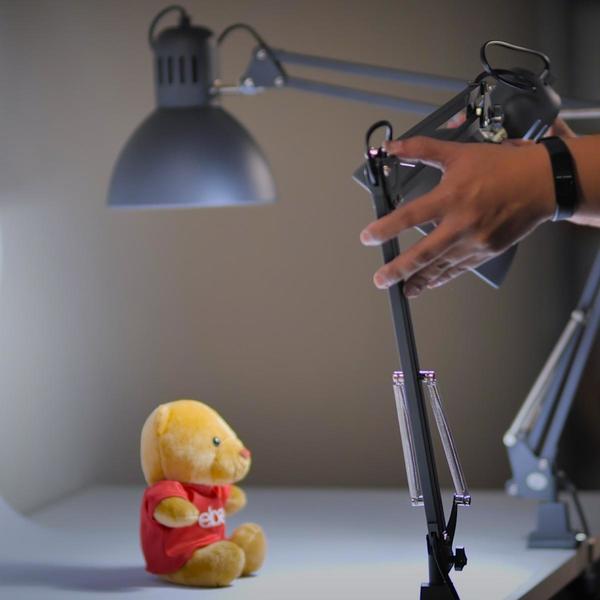
The first thing we are going to do is create a background. You’ll need to find a sturdy working surface, like a table. Then, you’ll need to prop the manila card against the wall and place the lamp at the end of the table.
Remember to keep your background as clean and simple as possible to reduce any clutter. White backgrounds are the best choice because it makes your product stand out.
Pro Tip:
-
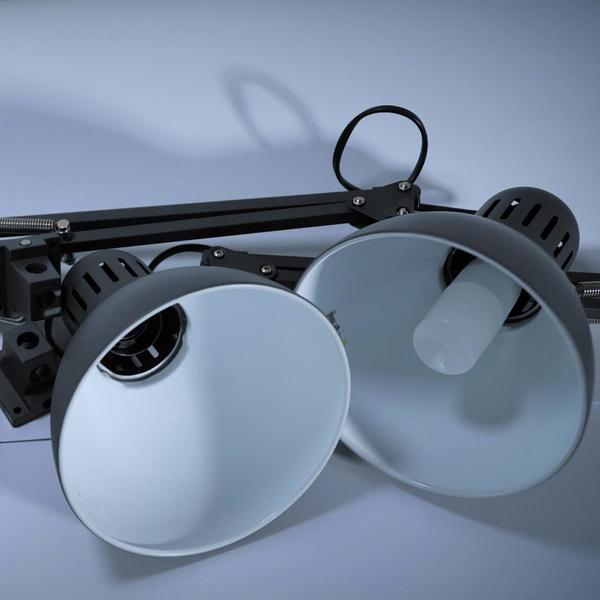
For the lamp, choose a model that comes with a bowl-shaped shade and flexible arm (as pictured) so that you can adjust your light source easily.
-
If you don’t have a manila card for the background, you can also use paper, cloth, foam board or a wall as long as it is white.
Lesson 2: Choosing the Right Lighting
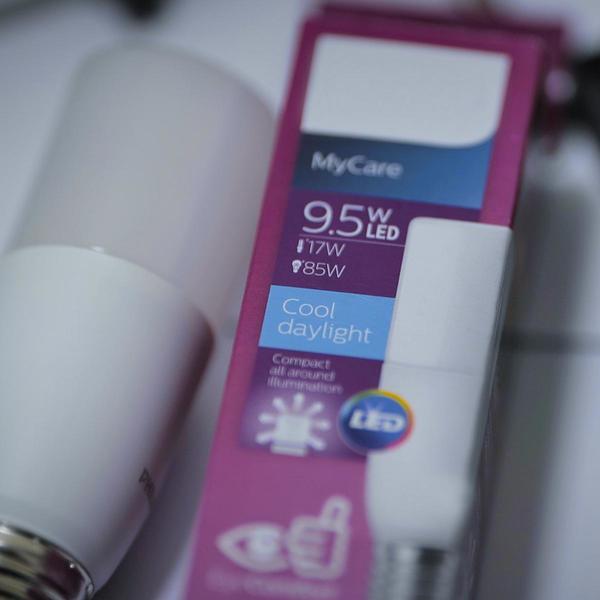
Good lighting gives life and vibrancy to your photos. It helps bring out the colour and detail of your product and makes it visually appealing. I'd suggest choosing an LED light bulb with a wattage of 9.5 watts and a bright, "cool daylight" warmth option.
I choose these specifications because higher wattage bulbs (9.5 watts and above) provide brighter lights. It also works better from a distance. Cool daylight bulbs give off a neutral coloured light that makes it easier for your camera’s light sensor to pick up.
If you’re not sure how to identify your bulb’s wattage, don’t worry. This information can be found on the packaging.
Pro Tip:
-
When shooting, refrain from using your smartphone’s flash or torchlight feature as it casts harsh shadows and light.
-
The bigger the product, the more light it will need. For products smaller than 10cm x 10cm, 1 lamp will suffice. Anything bigger than that will require 2 lamps.
-
Using a lamp instead of natural light allows you to keep your photo’s lighting consistent no matter what time of the day you take your picture.
Lesson 3: Shooting Your Product
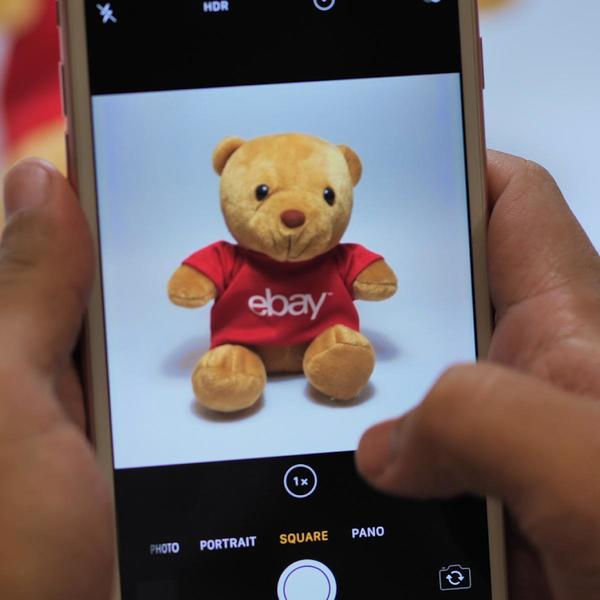
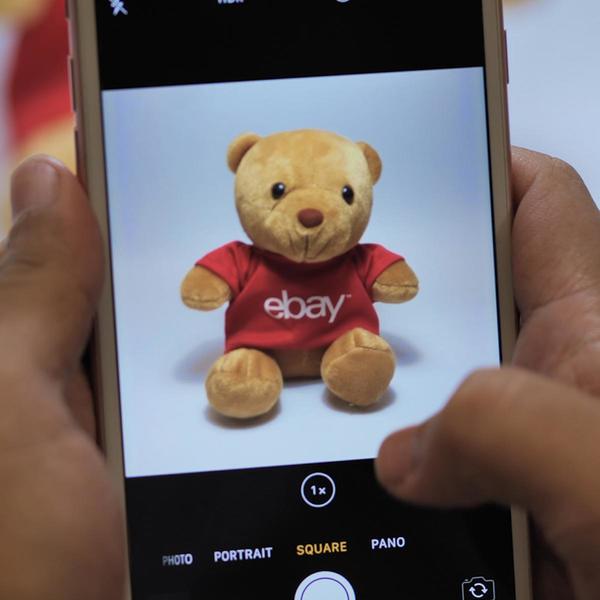
Before you shoot, first set your camera to shoot in 1:1 aspect ratio, which is a square picture. For iPhone users, launch the ‘Camera’ and swipe left until you have a square frame. For Android users, go to ‘Settings’ and choose the 1:1 aspect ratio.
Next, place your product in the centre of your background setup. Turn on the lamp and adjust the arm until your product is lit up evenly. Once you are satisfied with the lighting, you can begin to shoot.
Pro Tip:
-
For clearer and steadier photos, use a tripod. A tripod keeps your camera steady and prevents ‘camera shake’ when you take the photo.
-
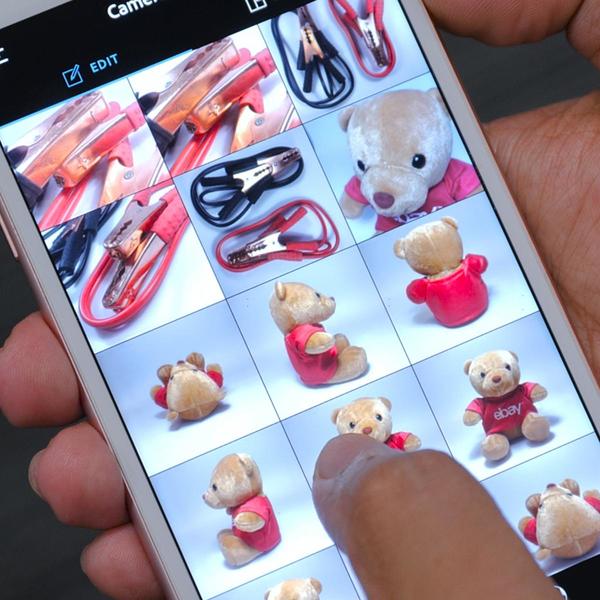
Experiment and capture as many photos as you can so that you can vet through and select which photos best show off your product.
Lesson 4: Highlighting the Right Angles
There are key aspects to bear in mind if you want to capture great product photos. A variety of differently angled photos will give your customers more perspectives into what they’re buying.
Make sure your photos capture these 5 main angles of your product: The front, back, left, right and top-down view.
For some products, you may need to have a close-up shot to show the texture, finishing, details and flaws. Important details for electrical appliances such as power and energy information are some of the product shots you need to consider covering in your listing.

Pro Tip:
-
eBay allows you to upload 12 images for free so upload as many angles as you can.
-
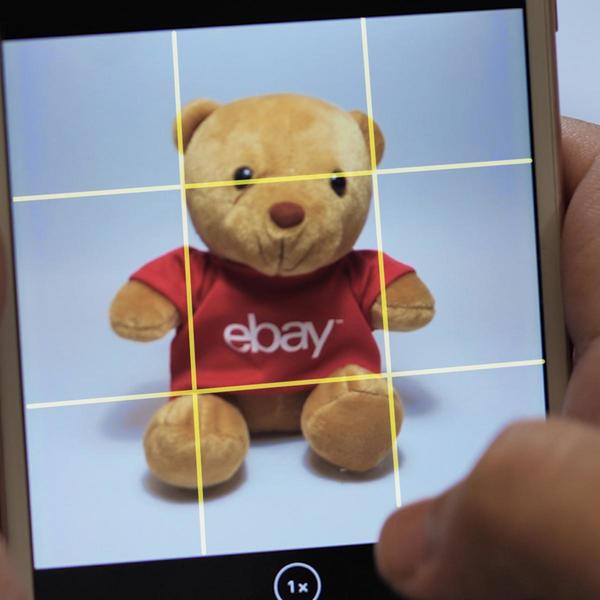
Before taking your photo, frame your product properly. Ensure the product is centred in the frame and takes up at least 80% of the space. This is to avoid the pinch-and-zoom gesture to help buyers see every detail clearly.
-
Original packaging assures buyers that your item is new. So, if you are selling a new item, don’t remove any seals or tags.
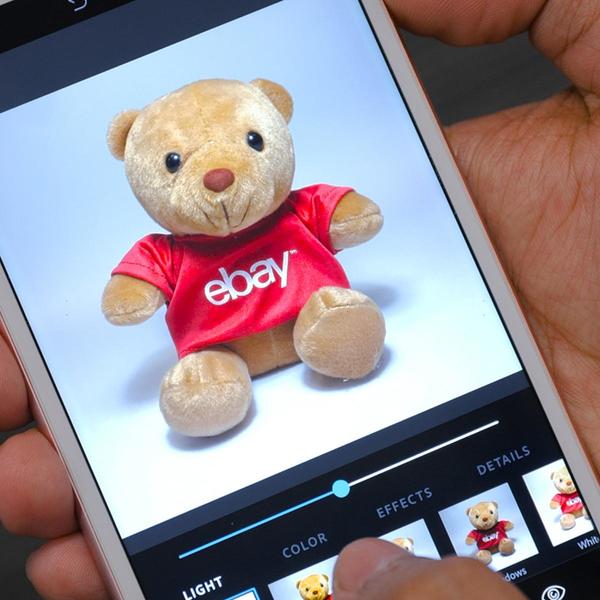
Lesson 5: Editing & Detailing the photo
Edit your photos to enhance them to perfection. You’ll be surprised what a difference minor edits can make. For editing, I would recommend using Adobe Photoshop Express or Adobe Lightroom which you can download from the Google Play Store or Apple App Store.
After you have launched the app on your mobile phone, you can start making edits. A few basic elements you can start with are:
-
Brightness
-
Contrast
-
Colour Saturation
-
Shadow/Highlights
-
Sharpness/Blur
Including measurements in your photographs is a helpful way to let buyers know what to expect. I would recommend using Microsoft Powerpoint to insert measurements into your photos.
Here’s how:
-
Drag the photograph into Powerpoint
-
Then go to ‘Insert’ > ‘Shapes’ > ‘Lines’ and select the double arrow shape.
-
Draw the arrows along the dimensions of the product.
-
Key in the measurements accordingly.
-
Select all the components, then ‘right click’ and select ‘Save as Picture’ to save.

Pro Tip:
-
Make sure your photo is saved at dimensions of at least 1000px x 1000px. This ensures that your photo stays sharp and will avoid the pinch-and-zoom gesture to view your product.
-
Avoid adding colours or text on your photo. These extra elements may distract the main thing that you are selling, which is your product. If you need to add measurements into your photo, do not cover your product.
